Sunday, August 28, 2011

Sacramento Rocks!!!


What a better way to spend Sunday morning other than going to the farmers market? :-) I know that many of you might think that I am crazy but what can I say other than I simply enjoy it! This is what I do on Sunday mornings if I am not going out of town and if I can’t go on the weekend I make sure I go on a weekday.
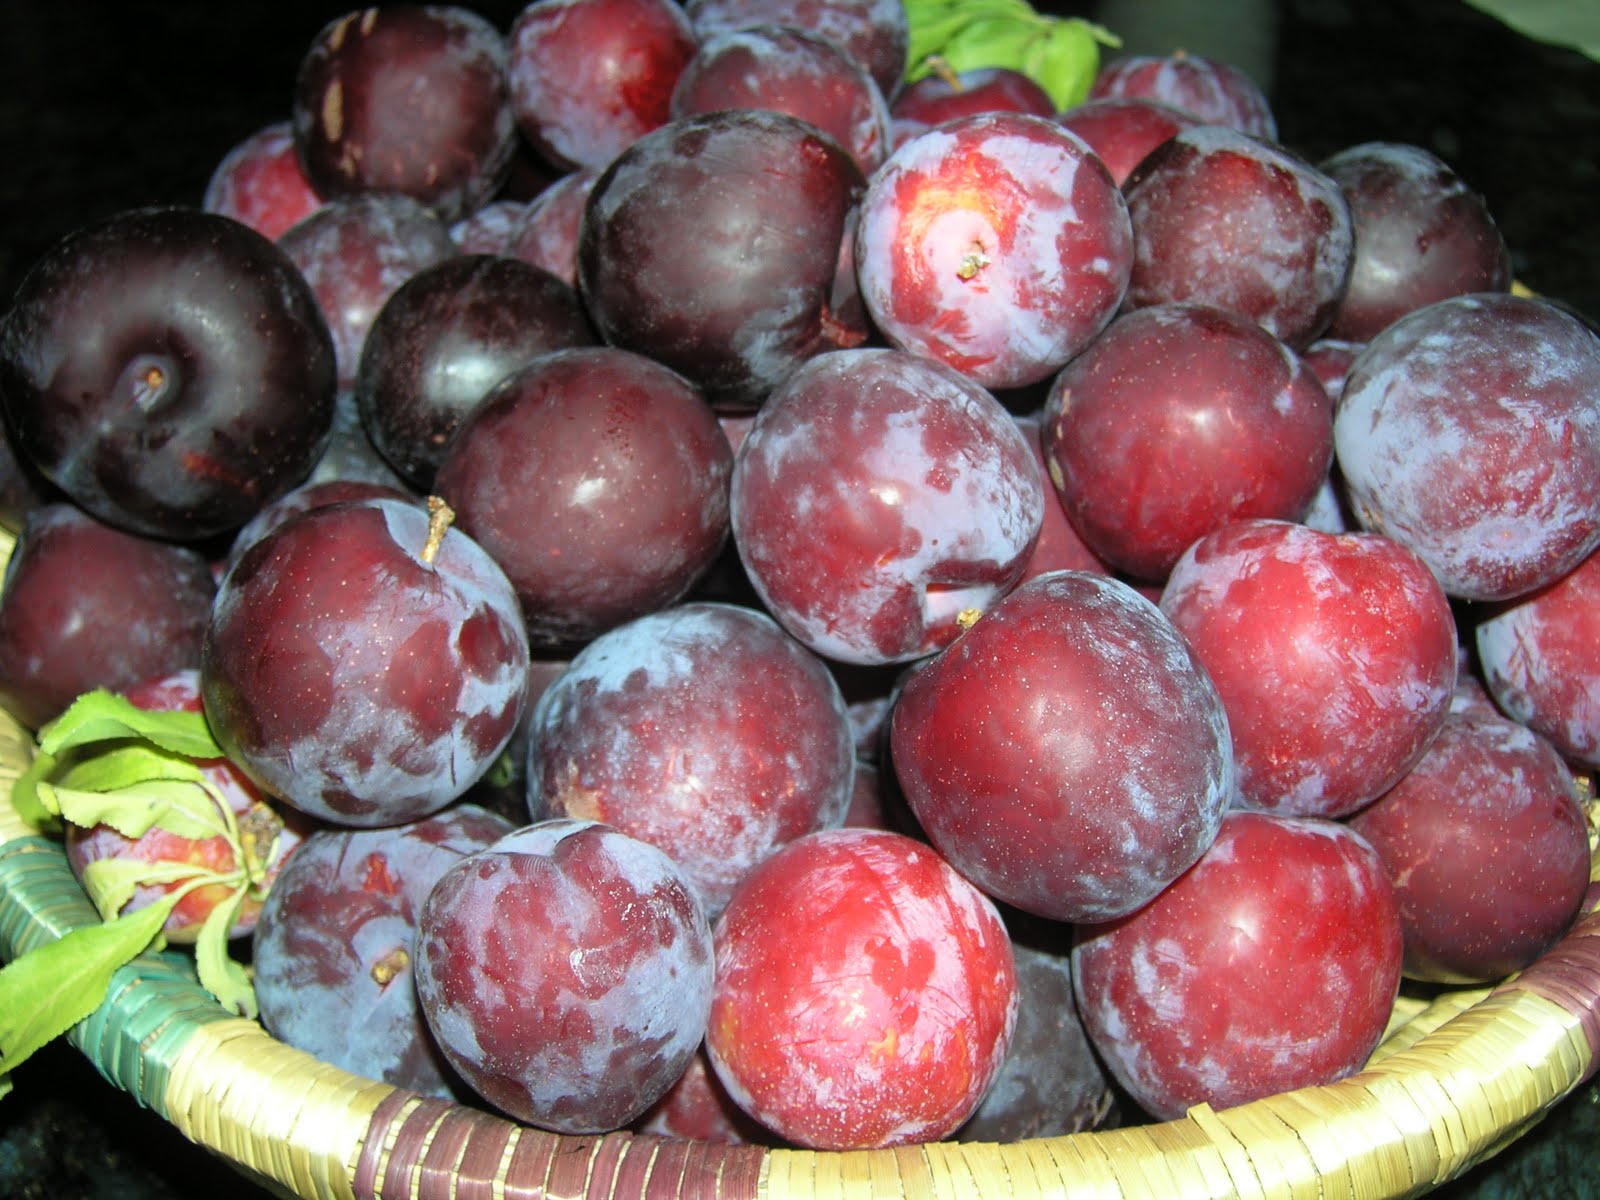
I get energized from all the smells, the colors, the bustling of the people, the noise….  while buying all the wonderful fresh fruit and vegetables and while chatting with the local farmers.
Every time I go to a farmers market beautiful memories are triggered. I go back in time when I was a teenager and I was getting up at 4:00 a.m. in the morning to go to the farmers market with my dad. He used to go every single day 6 days a week to buy all the fresh fruit and vegetables for his grocery store. I could never go every single morning though. Most of the time I preferred to check in to work at 7:30 or 8:00 a.m. :-) Since I am not an early riser 4:00 a.m. would not cut it for me BUT when I went I was happy! All the noise that was coming from the farmers doing transactions with the store owners, the earthy smells from all the fresh fruit and vegetables, and the wonderful aromas from freshly baked bread was simply energizing for me!

    
Sacramento has a lot of farmers markets in the metro area but also in all of the surrounded suburbs.


I never realized how much farming there is in the area and how many quantities of food come out of the local farms till I started living here. I am very fortunate and grateful to have access to all these wonderful fresh fruit and vegetables on a daily basis.
Let’s support our local farms while having fun!

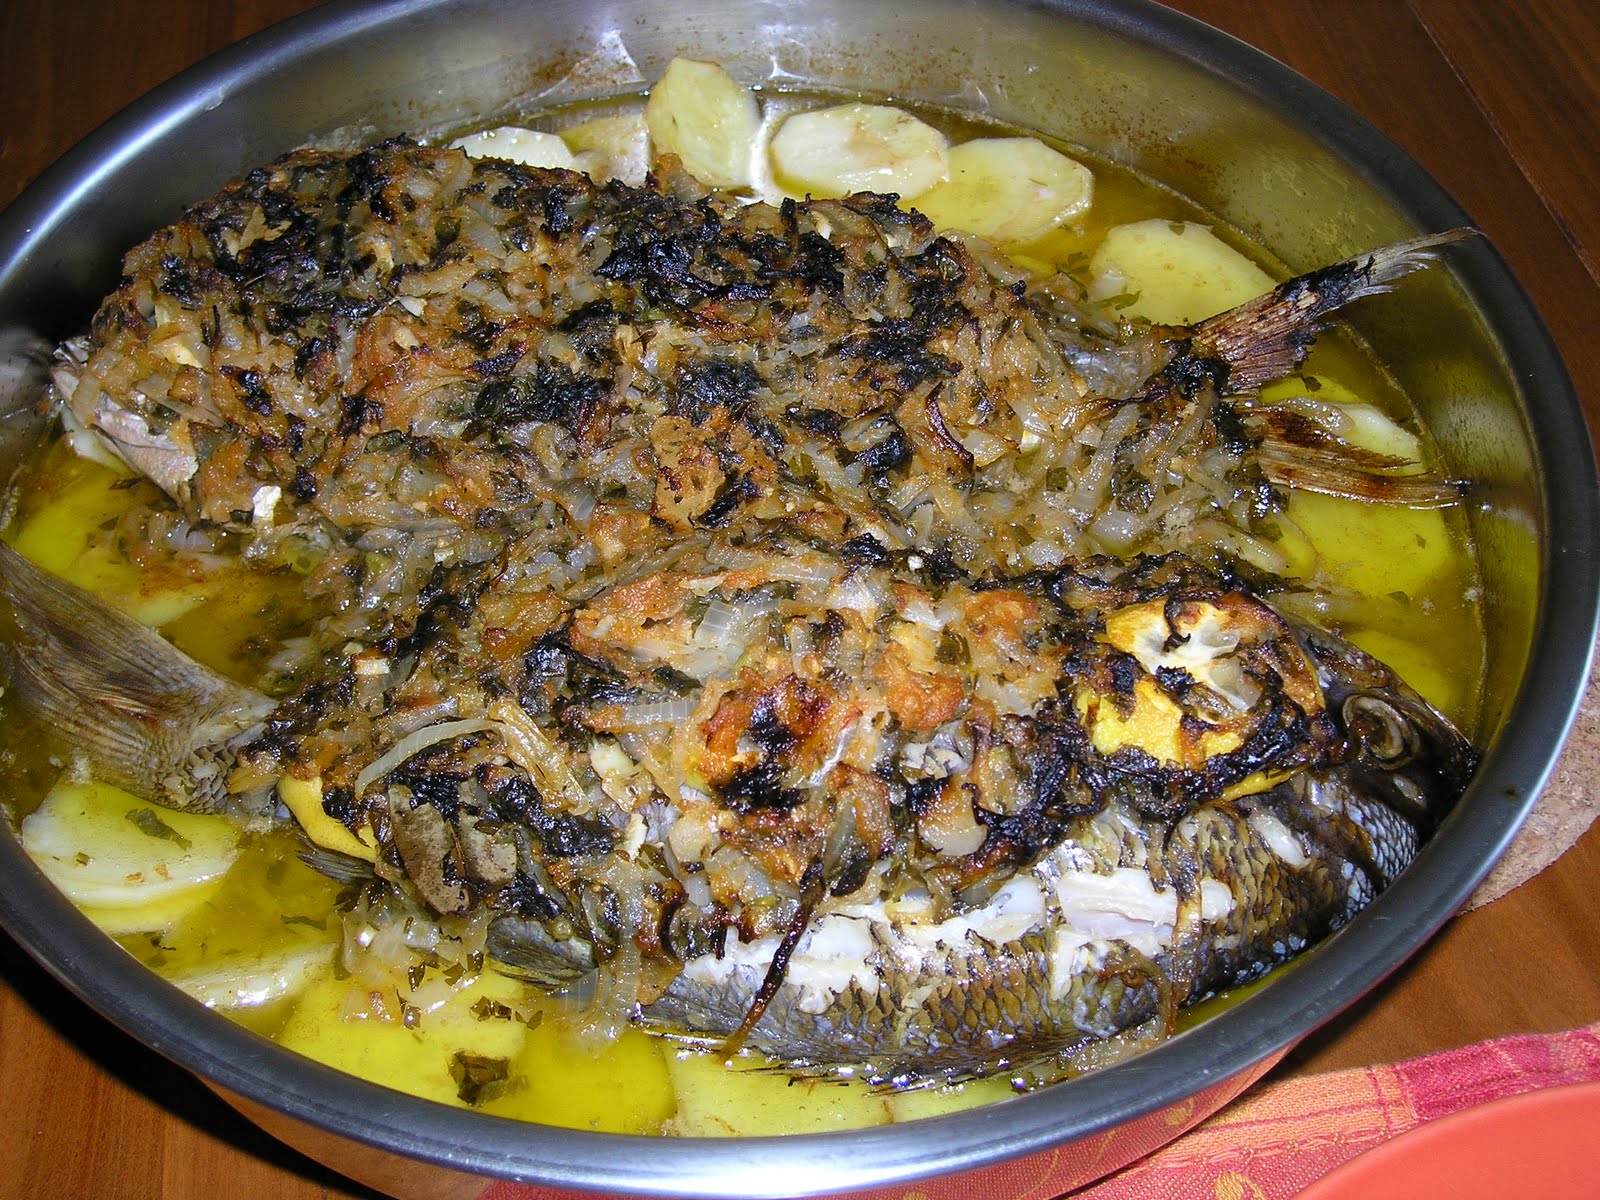
….and as always this past week I tried out a few of the local eateries – I like to call them jewels. Some of them I have gone to before while others I visited for the first time. Two  stood out this week. I went back to one of my favorite local restaurants – the Grange in the beautiful Citizen hotel. For the first time I went to their annual event which was held in the hotel – The Greatest Cocktail on Earth - where they served handcrafted cocktails while circus acrobats were entertaining the crowd– even though the event was fun our empty stomachs forced us to go into the main restaurant next door where we enjoyed a lovely dinner with great conversation. I had their delicious gnocchi with lobster mushrooms, fennel sausage, arugula and red pepper butter. The gnocchi was simply melting in my mouth! I highly recommend this dish! What I love about this restaurant is that the chef uses only local fresh vegetables and he changes the menu according to what’s available in the season.

Another restaurant I visited this week was Tokyo Fro’s Rockin Sushi bar on Fair Oaks blvd in Sacramento. I went there for the first time. They serve yummy sushi – I tried a few from my friends’ plates – but I opted for the salmon on the menu. It was the perfect choice – grilled and served with asparagus. While the salmon was moist and not overcooked the asparagus had too much salt so I could not finish eating them! This is a  casual restaurant with a large bar serving a lot of different kinds of sushi while offering live music and other great entertainment throughout the week.

I am telling you - the little town of Sacramento is rocking in every corner!

Till next time ...stay well!

Tuesday, August 9, 2011

Moutzendra – Lentil Pilaf - Μουτζεντρα


I just walked into the house after taking care of my garden. As always, I also sat down leisurely in the garden to simply enjoy it. My garden is my refuge. I go out there to think, write, have my coffee, have my dinner and many times I also go out at night to simply gaze at the stars. I love it and I am out there a few times per day, every day. Last week I did so much gardening that my back was hurting but the result was all worth it!
The colors and the smells I enjoy are invaluable. Every day I am able to cut a few gardenias and sometimes roses. There are so many flowers on the plants that I can afford to cut a few for the vases.
Well now, I am in my other favorite place of the house which is my kitchen. I have to prepare dinner.


This is what’s for dinner tonight! A healthy and hearty lentil pilaf the way we eat it back home in Cyprus. Everyone talks about the Mediterranean diet and the healthy way of eating in that part of the world. Well here I will give you a recipe of a meal that’s like a dynamite when you eat it J
It’s very high in protein, fiber and also contains, folate, and vitamin B1.

This is also one my daughter’s favorite dishes. People are amazed when they hear her asking me to make lentils; maybe it’s because my mom fed her so many lentils when she was a toddler!

I modified the recipe to make it healthier. Traditionally with moutzendra we fry the onions separately and we add them in the end and we just stir them into the already cooked pilaf. I avoid frying the onions and I just add them along with other vegetables. I learned from my mom to add tomatoes, carrots and zucchini in this recipe which makes it a lot tastier.
I also like this dish because it’s a whole meal on its own. You can just have a side green salad on the side and you are all set. You don’t need bread or other side dishes.

1 cup green or brown lentils
½ cup long grain white rice
1/3 cup olive oil
2 cups chopped or puree tomatoes
1 medium yellow onion finely chopped
1 cup chopped carrots
2 cups chopped zucchini
3 cups vegetable or chicken broth
1 cup water
Salt
Pepper

Place the tomatoes in boiling water for 5 minutes or more to soften the skin. Peel the skin off and chop the tomatoes. Set aside.
Wash the lentils in cold water and place in a saucepan. Add the three cups of vegetable broth, 1one cup of water, two cups of chopped fresh tomatoes, the olive oil, rice, and the finely chopped onion.
You can use either fresh or canned tomatoes. Fresh tomatoes will give more flavor.
Add the rest of the chopped vegetables. Cover with a lid. Bring to a boil then turn the heat to low.
Cook for 20 minutes. Add salt and pepper to taste.
Stir all the ingredients together. Continue to cook on very low heat for 15 more minutes or longer until all the liquid is absorbed and the rice and lentils are soft.
While the pilaf is cooking stir occasionally so it doesn’t stick to the bottom of the pan.
Turn the heat off. Place a towel under the lid to absorb all the extra liquid for a few minutes prior to serving.

Serves 6-8
  

Growing up we ate a lot of legumes in my family on a weekly basis so I got to love them. I hope more people learn to cook them other than just adding them plain into salads. There are a lot of delicious and versatile dishes having as the main ingredients, beans, lentils and chickpeas.

…. and I truly believe that it’s the ability to enjoy the simple things in life that makes happiness!
….. like cooking lentil pilaf and then sitting in the garden to enjoy it!  :-)


Καλη ορεξη

Sunday, August 7, 2011

Delicious Plum Marmalade for All Year Round


Just before the harvest!

 Cooking and creating in the kitchen is quite therapeutic for me. Since my spirits have been on the low side the last couple of months, I opted in for the kitchen therapy!

Since my plum tree gave me lots of juicy and delicious plums as it has been religiously doing for the last four years I decided to make some marmalade; a good solution for using all that fruit which by no means I could consume it fresh! :-)

Getting ready for the marmalade production
 My tree gives me about 20 pounds of fruit which is amazing for this young tree!
I made enough marmalade to last me through the winter months and also give away to my friends.

You can use fewer plums so you don’t end up with such a production like mine!

Plum Marmalade

11 pounds fresh plums
14 cups sugar
Juice of 3 large lemons

Wash all the fruit well in cold water. Peel the skin off the plums if they are very ripe otherwise leave it on. Cut the plums and discard the pits.
Place in a deep saucepan. No water is needed if the fruit is ripe.
Let is come to a boil on medium-high heat. Stir a few times with a wooden spoon.
Reduce the heat to low. Stir more frequently so that the fruit doesn’t stick or burn at the bottom. Cook until all the fruit is puree.
I like having pieces of the fruit in my marmalade so I don’t put it through a sieve.
Measure the fruit to determine how much sugar you will add.
For every cup of fruit puree I add a cup of sugar.
Place the measured fruit and sugar in a deep saucepan. Turn the heat to high and stir with a wooden spoon. Once it comes to a boil reduce the heat to very low. Continuously stir the mixture so it doesn’t stick to the bottom of the pot.
The fruit mixture will start to thicken.
After about 15 minutes add the juice of the three lemons.
Cook for another 30 minutes or until the marmalade thickens a bit.
It should drop from a spoon but not as liquid.
To make sure that it’s ready place one teaspoon of the marmalade in a small plate and let it cool off. Once you can separate it and it’s not completely liquid the marmalade is ready.

Let it cool off completely before placing into sterilized jars.

Marmalade is ready!
 Makes 22 jars – approximate size 3 ½ inches height and 2 ½ width
Love the Outcome!
 Enjoy and share the abundance!

Litsa - Λιτσα

Thursday, July 7, 2011

Summer Fig Salad with Halloumi - Σαλατα με συκα και χαλλουμι


 After a long absence I am back to start sharing with you some great summer recipes and update you on my food related projects!
Since the last time I posted a blog I traveled back to Cyprus for one more time (shortly after my trip during Easter) where I stayed there with my family for a few weeks.
I flew back home urgently to see my father who was gravely ill. A day after I arrived, my very dear father passed away. The loss is huge but life goes on.
How do you say a final good bye to someone you love so deeply?
Personally, I can’t so I continue living with the many fond memories I have of my father and I continue to keep him in my heart.
On a daily basis, my father continues to touch me and speak to me through the flowers and trees in my garden (most of them he has planted) and through my cooking. Thanks to him,  I learned to love both of these…
Today I will share with you a simple but yet tasty and healthy salad that my father loved.
Some of the figs on my fig tree are already ripe – the few figs that usually get ripe early on in the summer, are called Maggiles - ματζιλεs in my Cypriot dialect.

Green Salad with Halloumi and Figs

Growing up I had figs and halloumi with my father in our garden many times. We would cut the figs right off the huge fig trees, peel them and then pair them with a bit of halloumi and have a hearty but healthy breakfast. We would do the same thing at my father’s grocery store but there my dad would go to the vegetable stand and pull a few strands of fresh cilantrto, arugula and lettuce to eat them along with the fruit and the halloumi.
What a better combination of the pungy taste of the arugula, to be paired with the aromatic cilantro and the crunchiness of lettuce. Then the to pair two opposites tastes such as salty from the halloumi and sweet from the figs gives an unparallel taste.

1 cup chopped cilantro
1 cup romaine lettuce
3 scallions
1 cup chopped arugula
Pepper
225 grams halloumi(approximately half of the halloumi)
6 fresh figs

For the dressing
½ cup virgin olive oil
1 lemon

Wash all the vegetables in cold water.
Get rid of any excess water on the leaves.
Finely chop the arugula, cilantro, lettuce and scallions.
Slice the halloumi and cut into small cubes.
Peel the skin off the fibs. Cut in the middle. If the figs are very large, cut into quarters.
Place all the chopped vegetables in a large salad bowl.
In a separate smaller bowl whisk well the lemon, olive oil and pepper.
Drizzle over the salad.
Add the halloumi.
Toss well. Add the figs on top of the salad.

Serves 4 - 6

Enjoy with your friends and family!
Καλη Ορεξη

Tip of the day
Here is a tip on how to “force” figs to ripe faster. :-)
Take a small food brush, and brush their bottoms with some olive oil. This will help figs ripe faster!
 
Enjoy the Summer – Καλο Καλοκαιρι


Sunday, May 8, 2011

Fish Plaki - Ψαρι Πλακι


My dad's garden


My dad's garden

I am back after being absent for a few weeks. I went back home to Cyprus to visit my parents and my immediate family. I have to admit that it was a very emotional visit since my father hasn’t been well. I spent a lot of quality time with both of my parents and was mostly with them while in Cyprus. As I expected it was extremely hard to say goodbye and leave them behind in a very fragile state of health…

While I was back home I baked with my sister traditional Easter pastries as well as other delicacies and consumed a lot of these creations :-). I was able to bring  back with me a couple of new recipes which I need to try out soon and share with you.
… and since Easter is long gone, I decided to share a different kind of recipe today using fish and seasonal vegetables. I will share my Easter pastries’ recipes later on in the year.

Easter Pastries - Flaounes

In today’s recipe I use whole fish something that’s unusual in the U.S. It’s a very common way of cooking fish back home though. I hope I can encourage you to try it out. It’s a simple, yet easy and healthy recipe to execute.

Snaper


Fish Plaki
2 ½ pounds whole fish – snapper or other similar fish
2 ½ pounds red potatoes
1 ½ cups chopped tomatoes
2 medium onions
2 cups chopped parsley
1-2 lemons
1 cup olive oil
3 garlic cloves
3 bay leaves
Salt
Pepper

Peel and slice the potatoes – ¼ inch thick. Place in cold water so they don’t turn brown.
Wash and slice the lemons; set aside.
If using whole fish, clean it from the intestines and the scales. Wash in cold water.
Peel the onions and cut in semi-circles. On high heat sauté the onions in half of the olive oil. Add the finely chopped garlic. Slowly add the chopped tomatoes and bay leaves. Let them cook for 2-3 minutes. Season with salt and pepper. Lastly, add the chopped parsley. Stir and remove from the heat.
In a deep baking dish place the potatoes in layers. Season with salt. Drizzle over them the remaining olive oil.

Place the fish on top of the sliced potatoes. Place a few lemon slices on top of the fish and then pour part of the tomato sauce.
Fish Plaki

Cover with parchment paper and bake in a pre-heated oven at 400 degrees for about 45 minutes or until you can easily fork the fish.
A few minutes before removing from the oven remove the parchment paper so the fish can get a nice golden color on top.
Cooked Fish Plaki

Serve immediately.
Καλη ορεξη!!!


Makes 4-6 servings

 Till next time stay well!

Saturday, April 9, 2011

How about some pita pockets?


I know that I have been away from my blog a little bit longer this time. A lot has been going on but it's all good. I am preparing for a trip back home to see my family while I am taking care of things on my U.S. home front. I am looking forward to going going back home and as always I dread the good byes. Over the years, I have come to accept that I am terrible with saying goodbye to loved ones and I wish I never had to do it. The truth though is that in life everything has an expiration date ... and we need to savor the moment, get the most out of life experiences before they come to an end!

These past few weeks, I have also started preparing my vegetable garden. Added lots of new soil and got rid of all the weeds. I will keep you updated... My goal is to enjoy some nice tomatoes, eggplants and zucchini this year.

I have also been continuing with my cooking classes something that's very fulfilling to me. I just had a great class two days ago. It was a full class with 18 people attending my hands-on class on Mediterranean vegetarian dishes. It was a lot of fun meeting new friends and also seeing some of my old cooking pals. We cooked, we joked a lot, we listened to Greek music and in the end we all enjoyed a nice meal together. What else can I ask for!

So my creative baking juices have been flowing these last few days and they have resulted into some action :-). The result is some pita bread! Easy and fun to make. I love pita pockets - they are so versatile! I use them to make sandwiches, serve them with dips, bake them and make simple pita chips for snacks and just eat them as part of any meal throughout the day.

Growing-up we used to eat pita bread along with our kebabs. We would always eat pita pockets that were filled with kebabs, chopped parsley, tomatoes, cucumbers and onions - yum! We would also make a variety of sandwiches with pita pockets which as you might already know can be different sizes and shapes.

Remember that you can always use white whole wheat flour which is a lot healthier than just white flour. I have started experimenting more and more substituting that in all of my recipes.


Pita Bread

2 teaspoons dry yeast
1 cup and 2 ½ ounces lukewarm water
1 1/3 tablespoon olive oil
3 ½ cups white whole wheat unbleached flour
1 teaspoon salt

In a large bowl combine the dry yeast, olive oil and lukewarm water.
Stir well and add ¼ cup flour in that. Cover with a towel and set aside for
5 – 10 minutes.
Pre-heat the oven to 450 degrees. Place in the hot oven the baking sheets you will be using.
Add the salt, and the remaining flour.
On a floured surface, start kneading the dough with your hands for about five minutes or until the dough is shiny, has a lot of elasticity and doesn’t stick to the hands.
Place back into the bowl. Spray some olive oil all over it and cover with a moist towel. Place in a warm area and let it rise for an hour and a half.
Divide into 12 round balls.

Place them on a baking sheet and let them rise for another 10 minutes.
On a floured surface, roll out each one of them into a 5-7 centimeters circle with approximately ½ centimeter thickness. 

Set them aside for another 10 minutes before baking.
Place on the hot non-greased baking sheets and into the oven.
Bake for about 1 ½ minutes on each side.
The dough will puff up creating the desired pocket.
Flip once. Let them cool off on a wire rack.

 Serve warm or at room temperature.

Tip of the day - storing pita bread in the freezer.
You can store them for a few months. After your pita pockets have cooled off completely, you can stack them in a zip log bag separating them with some parchment paper. Close the bag and store in your freezer. Take out as many as you need each time and then place back into the freezer.
Enjoy!

I hope to communicate with you once more before I take off for Europe but if I don't make it I will make sure that I post my baking Easter creations from Cyprus.

Sunday, March 27, 2011

Enjoying the Journey


A few days ago, I was talking with a good friend of mine about my culinary journey and its adventures and about all the things I want to do but I don’t have enough time …to do them! She simply answered to me – Do as much as you can and the most important thing is to enjoy the journey! It’s so true and I am so glad she said that to me! I try to remind myself of that all the time and I try to read my favorite’s poet K. Kavafes’ masterpiece (in my opinion) Ithaka – a poet which is all about the life journey and that it’s upto us to make it rich …

So this past week I tried to put things in perspective and stop dwelling on the ideas I have but I have no time to implement and focus on things I can do ... so this past Thursday I took a demonstration class with one my favorite chefs in the Sacramento area – Michael Tuohy. I thoroughly enjoyed the class and needless to say I had a delicious dinner which consisted of carnaroli risotto with asparagus and baby artichokes, halibut with Spring vegetable ragout and strawberry crisp. Michael Tuohy is the executive chef at Grange restaurant in Sacramento. I love all the food on the menu at this restaurant. The reason why I am drawn to his cooking is because he loves to cook with fresh local ingredients. It doesn’t take a lot to win me over to some style of cooking if it involves seasonal, fresh and local vegetables! A great way of cooking that I hope more of us adapt and follow.
 
Here is one of my favorite salad recipes that I created using seasonal vegetables. Try it and let me know what you think. It’s also a powerhouse of vitamins and anti-oxidants based on the ingredients that it has so you can fully enjoy it.

 
Crunchy Asparagus Salad

1 bunch asparagus or 8 stalks
½ cup roasted chopped walnuts
½ cup roasted pine nuts
1/3 cup roasted sesame seeds
1 garlic clove finely chopped
1 large red beet
1 cup chopped celery
½ cup crumbled feta
½ cup virgin olive oil
¼ cup wine vinegar
2 teaspoons pomegranate syrup or
substitute with some fresh pomegranate juice


First prepare the dressing.
In a bowl mix the olive oil, finely chopped garlic, wine vinegar and pomegrante syrup. Wisk well and set aside.

Cook the beet in boiling water. Let it cool off and remove the skin.
Cut in small cubes.
Wash the celery stalks and cut in small cubes.
Cut the bottom part of the asparagus which are not tender.
Place in a steamer and cook for 5 minutes or until you can easily fork them.
Don’t overcook them because we want them to maintain their crunchiness.
Cut in small bite size pieces and place in a salad bowl. Add the beet and celery.
Add the pine nuts, chopped walnuts and roasted sesame seeds into the salad.

Drizzle over the dressing. Toss well. Sprinkle the feta on top and serve.

You can also use other types of beets other than the red ones and you can mix and match! Remember that bright colors are appetizing!

Makes 4-6 servings

I love this salad because it’s easy to make and it’s tasty. The crunchy part of it is great for me since I love crunchy food!

Καλη ορεξη!

Till next time stay well!


Tuesday, March 15, 2011

My Beloved Home Town - Lefkosia – Λευκωσια


Lefkosia  - Λευκωσια is where I lived most of my life. That’s where I was born and that’s where I spent some of the formative years of my life. I miss my city and the medieval walls that surround the old town. These distinctive walls offer a welcoming contrast to the modern and cosmopolitan character of the new part of the city. Lefkosia which has thousand years of history that date back to the bronze age is build around these 16th century walls that were built by the Venetians.

The part of the town that’s the closest to my heart is the old part of town where most of the houses date back to the late 1800s or very early 1900s. There are beautiful churches in this part of the town that are from the Byzantine times. Some of the streets are so narrow that only one car can get through.
Even though I have been living abroad for quite sometime, friends and relatives  ask me for directions when I visit during the summer and we get to the old part of the town. I know all the streets and I can get around the old town without getting lost or more precisely I know all the street shortcuts.
I got to know them by exploring them either on foot, riding my bike or my car. I always loved this town so much that I wanted to get to know each street, each corner, each little antique shop – as if I wanted to have it engraved in my mind and I think I have succeeded!

If you ever visit the beautiful island of Cyprus you have to visit its capital – Lefkosia.

It’s in the old part of town that I went to have some traditional desserts with my sister while I was visiting this past summer.
We went to an old coffee shop tucked in the beautiful courtyard of an old elementary school – the one our mom attended – and next to a beautiful old church.
The elementary school my mom attended
Here is the recipe of my favorite Greek dessert – Galaktoboureko. Every time I eat it I am transported to happy times as a child ...
 
Galaktoboureko - Γαλακτομπουρεκο
1 pound phyllo
1 cup unsalted butter

Syrup:
2 cups sugar
1 cup water
1 cinnamon stick
1 tablespoon orange juice
Orange rind

Custard:
4 cups milk
½ cup semolina
½ cup sugar
4 eggs
1 teaspoon vanilla
1/3 cup unsalted butter

First, prepare the syrup. In a saucepan, combine the sugar, and the water with the cinnamon stick and orange rind. Stir over medium heat until the sugar is dissolved. Let it continue boiling for an additional five minutes until it thickens a bit. A couple of minutes before you remove it from the heat, add the orange juice. Set aside to cool off.

Start the second step. Take two phyllo sheets at a time and place them in an 8 by 12 inch baking pan. Brush the top phyllo sheet with melted butter. Continue the same process with another two sheets until you have used half of the phyllo sheets in the package.

Next, prepare the custard. In a saucepan, heat the milk and let it cool off a little bit. While the milk is cooling off, in a bowl, mix together the sugar with the eggs. Use a blender to mix well until the mixture is fluffy. Add the semolina. Pour this mixture into the milk. Place on medium heat and stir with a wooden spoon. Continue stirring to avoid the creation of any lumps. The mixture will slowly start to get thicker. It is thick enough when it can still drop from a wooden spoon. Remove from the heat and add the butter and vanilla.

Pour in the custard over the buttered layers of phyllo. Spread it out evenly. Start adding phyllo sheets over the cream. Place two at a time after brushing them with melted butter. Repeat these steps until you have used all the phyllo sheets. Lightly score the top layer with a sharp knife in order to create rhombus or square shapes.  (Do not cut all the way through the pastry.  Once the pastry is baked, it will be easy to cut in these shapes.) Brush the top layer with butter and then sprinkle with a little bit of warm water.

Place in a pre-heated oven. Bake at 375 degrees for 15 minutes. Continue baking at 350 degrees for another 40 minutes. It is fully baked once it has a golden color on top. Once you take the pastry out of the oven, pour very slowly the cold syrup using a ladle. Try to spread the syrup over the entire surface of the dessert.

Do not cover the pan, because the phyllo will soften. Set aside for a couple of hours before serving. It needs time for the syrup to be absorbed.

Serve cold. Except in very hot climates or seasons, you can leave the pastry outside the refrigerator for a day.

Makes 10-15 servings depending how big the pieces are.


I hope you make it and you share it with love.


Every year when I go back home I spend a day going around the old town. I usually park far away from the city and I walk. I go through all the familiar streets, I visit the farmers market, I take pictures, I have coffee at the small traditional kafeneia, I talk with the locals and I just enjoy the city and its people. I stop and observe the different small shop owners trying to sell goods to the tourists, I visit antique shops and sometimes I cry when I see some parts of the town which are now run down. I take my time, I don’t rush as if I want to take part of the town with me to California; have it with me till the next time I visit. When I do my annual visit which is like a pilgrimage to me I like to do it on my own and with no time constraints. My family knows that it’s my day with Lefkosia. When they ask me what time I would be back I always say – I don’t know.
... and Lefkosia is indeed with me everywhere I go.

Τα λουτρα της Εμερκες - Old communal baths

Lefkosia remains the only divided capital in the world. After the Turkish invasion in 1974 the town was divided. I actually come from the area that’s under the Turkish occupation. During the war in 1974 we had to flee to another part of the town but then we couldn’t go back. For the last few years we are allowed to cross the divided line and go to that area but only as visitors. Greek and Turkish Cypriots cross the divided line every day.
I visited the part of Lefkosia where I grew up as a child three times. I stopped going because it hurts too much.

Wednesday, March 2, 2011

Pumpkin Pastries All Year Round - Κολοκοτες


I love to bake pumpkin pastries all year round because I simply love pumpkin but I also love the idea that I can make them and freeze them so I can enjoy them for long periods of time.
Baking and especially making dough relaxes me so it’s one more reason for me to bake often!
I know that many people think and use pumpkin only during the Fall. Well, that’s not me.
These are what I baked a few days ago. 


Growing up in Cyprus I would always see my mom and her friends buy a few of these huge pumpkins only once a year. They would only cut and use one of the pumpkins in order to make pastries and store the others in a cool place of the house so that they would continue baking pastries all year round.  Many times a few friends would get together for this elaborate baking process so at the end of the day and at the end of the production line there were always several yummy pastries!

Our pumpkins back home are long and elongated with a very light yellow color on the outside and very dark yellow/ almost orange color on the inside. They are the equivalent of the round large pumpkins we use here in the U.S.

These traditional pastries we make in Cyprus are labor intensive so when we make them we do so in large batches. We even freeze some so that we can enjoy these delicious pastries for a long time.

This is what I made a few days ago. Perhaps you get a couple of friends or family members to help you and you start baking and creating lots … and then start distributing the “wealth”. J

In Cyprus we call these – kolokotes ~ κολοκοτες

Here is my mom’s recipe.
Traditionally we use bulgur in the filling and NOT rice or any other type of grain!

Kolokotes  - Pumpkin Pastries                         

7 cups pumpkin chunks – can also use butternut squash (3 ½ - 4 pounds)
7 tablespoons bulgur – preferably the thicker grain (number 4)
7 tablespoons canola oil
3 tablespoons brown sugar
2 cups raisins
1 teaspoon ground cinnamon
½ teaspoon ground cloves
½ teaspoon salt
½ teaspoon black pepper

For the Dough
12 cups flour
1 cup orange juice
1 teaspoon salt
1 ½  cups canola oil
1 ½ cup cold water

For the Top
2 eggs
¼ cup milk

Peel the butternut squash or pumpkin. Remove the seeds and pumpkin threads. Cut up the pumpkin into 1 inch cubes.
In a large bowl mix the bulgur, sugar, raisins, canola oil and all of the spices. Mix well and set aside. Cover the bowl with plastic wrap and leave overnight. Do not refrigerate.
In a separate bowl, put the flour along with the salt. Make a well in the middle  and pour the canola oil. With your fingers, rub the oil into the flour for a couple of minutes. Start slowly adding the orange juice and water. Knead the dough until it is firm and does not stick to your hands. Leave the dough in the bowl for about an hour, covered with a couple of thick towels.
Split the dough into 3 equal parts. Take one and leave the others in the bowl covered with a towel.
Sprinkle the third piece with some flour and place it on a floured surface. With a rolling pin, roll out the dough into a pastry sheet of about 48 centimeters diameter. The thickness of the pastry sheet should be 1/16 of an inch. 


At the end of the pastry sheet place 3 tablespoons of the pumpkin filling, leaving some space in between. Fold over the dough once and then with a dough cutter, cut around the filling in the shape of half moon.


Continue this step until the entire pastry sheet is used. If you have any little dough pieces left don’t throw them out. You can save them until the end and use them to roll another smaller dough sheet.
Repeat the above process with the other two pieces of dough.

 
Wisk the egg well with the milk.  Brush over each pastry.
Bake the pastries in a preheated oven at 350 degrees for approximately 40-45 minutes. They are fully baked once they have a golden color on top.

Makes approximately 50 pastries.
Served warm or at room temperature for breakfast or snack.
Can be stored in a freezer for 2-3 months.

Thursday, February 24, 2011

Dining in Sacramento with Belly Dance!


After a belly dance show and after my belly dance class this week I feel I have to share some of my recent experiences dining at local restaurants which are associated with this wonderful dance.

Some great restaurants in Sacramento have regular belly dance performances while serving delicious food. One of the restaurants that come to mind right away is Marrakech on Fulton avenue. In my opinion they serve the best Moroccan food in town. I love the cozy and exotic ambience that’s created with all of the special cloth that covers the walls, drapes from the ceilings along with all the large cushions that are spread everywhere.

If you don’t mind family style meals where you share food from large plates while using just your fingers for utensils at least for the appetizers then this is a place you need to visit.
I love the ceremony of washing hands before and after a meal. I never experienced that in a restaurant where they bring you water and towels to wash your hands right at the table.


 I especially loved the chicken pie one of the many appetizers. It has an unusual savory taste. It has chicken and almond filling mixed with spices enclosed in a thin crust with lots of powdered sugar dusted on top; you literally lick your fingers :-) I just loved everything I ate there, from the lamb kebabs, to the baked chicken, vegetables with rice and the eggplant salad. Needless to say that the way the tea was served it was quite unique and the tea was simply delicious.


I loved watching the belly dance performance while having this delicious feast. The waiters were friendly and always posed with a smile for a photo – I guess they are used to it.

A couple of days ago I went back to Kasbah Lounge on J street for a belly dance performance. Kasbah is a smaller restaurant than Marrakech but with a comparable cozy ambience. The Middle Eastern food that’s served there is delicious. This time I had Kefta - ground spiced beef and lamb kabobs served with grilled eggplant & preserved lemon-cilantro yogurt. Being the yogurt lover I am, I loved the way they prepared the yogurt. I will definitely try preparing it that way.

Last Monday they had a belly dance show that lasted for two hours featuring many different dancers with different dancing styles. I wish I could dance like them! Belly dance looks easy but it’s so hard to dance some of the moves! I will continue practicing hoping that one day I will be able to do a simple belly dance!
Just listening to the music makes me move but not necessarily in the right direction but I move! :-)

If you are in the Sacramento area dining at these two local restaurants is a must!

Stay tuned for some of my baking next time!
Καληνυχτα - Good night.

Wednesday, February 16, 2011

Sharing, connecting, enjoying ..… while having dinner together


Here I am after a rejuvenating weekend where I spent time with friends, went on a couple of hikes, danced, baked a lot and simply connected with people I care about and did the activities I love the most.

While waiting for dinner ... with friends

Sharing, connecting, enjoying .....while having dinner together has been on mind a lot lately. The concept of cooking and having dinner together as a family is getting to be a rare commodity these days at least in the American society and it makes me really sad to see that.
There are signs though that it might be getting back into our lives here in America because of the bad economy. Everything in life has the positive and negative side and the poor economy has certainly some positive effects; bringing families closer. It’s getting quite expensive to eat out all the time so more and more people opt to home cooking and sharing meals as a family.

Over the years, I have made it a priority to cook and eat at home as a family for most of the days of the week. I can already “hear” your protests telling me that you are working long hours and you don’t have the luxury of cooking after a long day’s work. On top of that everyone in your family has a weird and busy schedule and it’s not easy to coordinate so that everyone can eat together. I have to disagree. It’s possible to eat together as a family at least a few days of the week. It does require planning and it does require making it a priority on everyone’s schedule but it pays off in the end. It brings people together and closer to one another when they prepare and share meals together.

It’ doesn’t have to be an elaborate meal as long as you prepare it at home. Set the table nicely – I am big on that – great atmosphere helps me get in a great mood and enjoy my meal even more. I am also a big advocate to use whatever I have; I use my nice plates and candles all the time. If I have something I use it. I don’t save things just for special occasions.

I have made it a priority in my family to have dinner together with a home cooked meal at least a few times per week now that my daughter is a teenager and she has her own schedule. When she was little a home cooked meal was a daily routine.
Cooking dinner together or simply eating together is a bonding experience that I greatly value and enjoy. It’s a time where I forget about everything else and I talk with my family about our day, what went well and what went wrong, laugh and simply enjoy each other’s company! During dinner I take the opportunity to talk with my family about things we normally don’t have time to discuss at other times because we are so busy. And don’t forget that eating a home cooked meal is healthier than an average restaurant – I am not referring to high end restaurants - and it can also be less expensive! It’s a win-win situation.

Worldwide leaders have talks and discussions about serious issues over a luncheon or dinner. Food is a universal language that brings people together so why can’t we use it more at our own homes?

Based on this article I have recently read more and more people in America are doing it as well. Hooray!

This is what was served for dinner in my house tonight.
It’s very easy to prepare!


Wild Pacific Cod with Olive Tapenade

1 ½ pounds wild Pacific cod
2 tablespoons ground pecans
2 ounces anchovy fillets in olive oil
½ cup finely chopped green olives
½ cup olive oil
3 large potatoes
½ cup chopped parsley

Slice the potatoes. Place at the bottom of a baking dish. Drizzle half of the olive oil over the potatoes.
Place in a pre-heated oven and bake at 400 degrees for 15 minutes uncovered.
Prepare the olive tapenade. Finely chop the olives, parsley, anchovies, mix with the ground pecans and the olive oil from the anchovies. Mix well together.
Take the potatoes out of the oven.
Place the cod fillets over the potatoes.
Drizzle the rest of the olive oil over the cod fillets.
Place a couple of teaspoons of the olive tapenade over each fillet and cover with foil.

The last 3-4 minutes before removing from the oven remove the foil.

Bake for 20-25 minutes.
Serve immediately with a nice green salad.

Serves 4

Enjoy while sharing with others!

Bon Appetit – καλη ορεξη!

Till next time ...stay well.