Sunday, May 8, 2011

Fish Plaki - Ψαρι Πλακι


My dad's garden


My dad's garden

I am back after being absent for a few weeks. I went back home to Cyprus to visit my parents and my immediate family. I have to admit that it was a very emotional visit since my father hasn’t been well. I spent a lot of quality time with both of my parents and was mostly with them while in Cyprus. As I expected it was extremely hard to say goodbye and leave them behind in a very fragile state of health…

While I was back home I baked with my sister traditional Easter pastries as well as other delicacies and consumed a lot of these creations :-). I was able to bring  back with me a couple of new recipes which I need to try out soon and share with you.
… and since Easter is long gone, I decided to share a different kind of recipe today using fish and seasonal vegetables. I will share my Easter pastries’ recipes later on in the year.

Easter Pastries - Flaounes

In today’s recipe I use whole fish something that’s unusual in the U.S. It’s a very common way of cooking fish back home though. I hope I can encourage you to try it out. It’s a simple, yet easy and healthy recipe to execute.

Snaper


Fish Plaki
2 ½ pounds whole fish – snapper or other similar fish
2 ½ pounds red potatoes
1 ½ cups chopped tomatoes
2 medium onions
2 cups chopped parsley
1-2 lemons
1 cup olive oil
3 garlic cloves
3 bay leaves
Salt
Pepper

Peel and slice the potatoes – ¼ inch thick. Place in cold water so they don’t turn brown.
Wash and slice the lemons; set aside.
If using whole fish, clean it from the intestines and the scales. Wash in cold water.
Peel the onions and cut in semi-circles. On high heat sauté the onions in half of the olive oil. Add the finely chopped garlic. Slowly add the chopped tomatoes and bay leaves. Let them cook for 2-3 minutes. Season with salt and pepper. Lastly, add the chopped parsley. Stir and remove from the heat.
In a deep baking dish place the potatoes in layers. Season with salt. Drizzle over them the remaining olive oil.

Place the fish on top of the sliced potatoes. Place a few lemon slices on top of the fish and then pour part of the tomato sauce.
Fish Plaki

Cover with parchment paper and bake in a pre-heated oven at 400 degrees for about 45 minutes or until you can easily fork the fish.
A few minutes before removing from the oven remove the parchment paper so the fish can get a nice golden color on top.
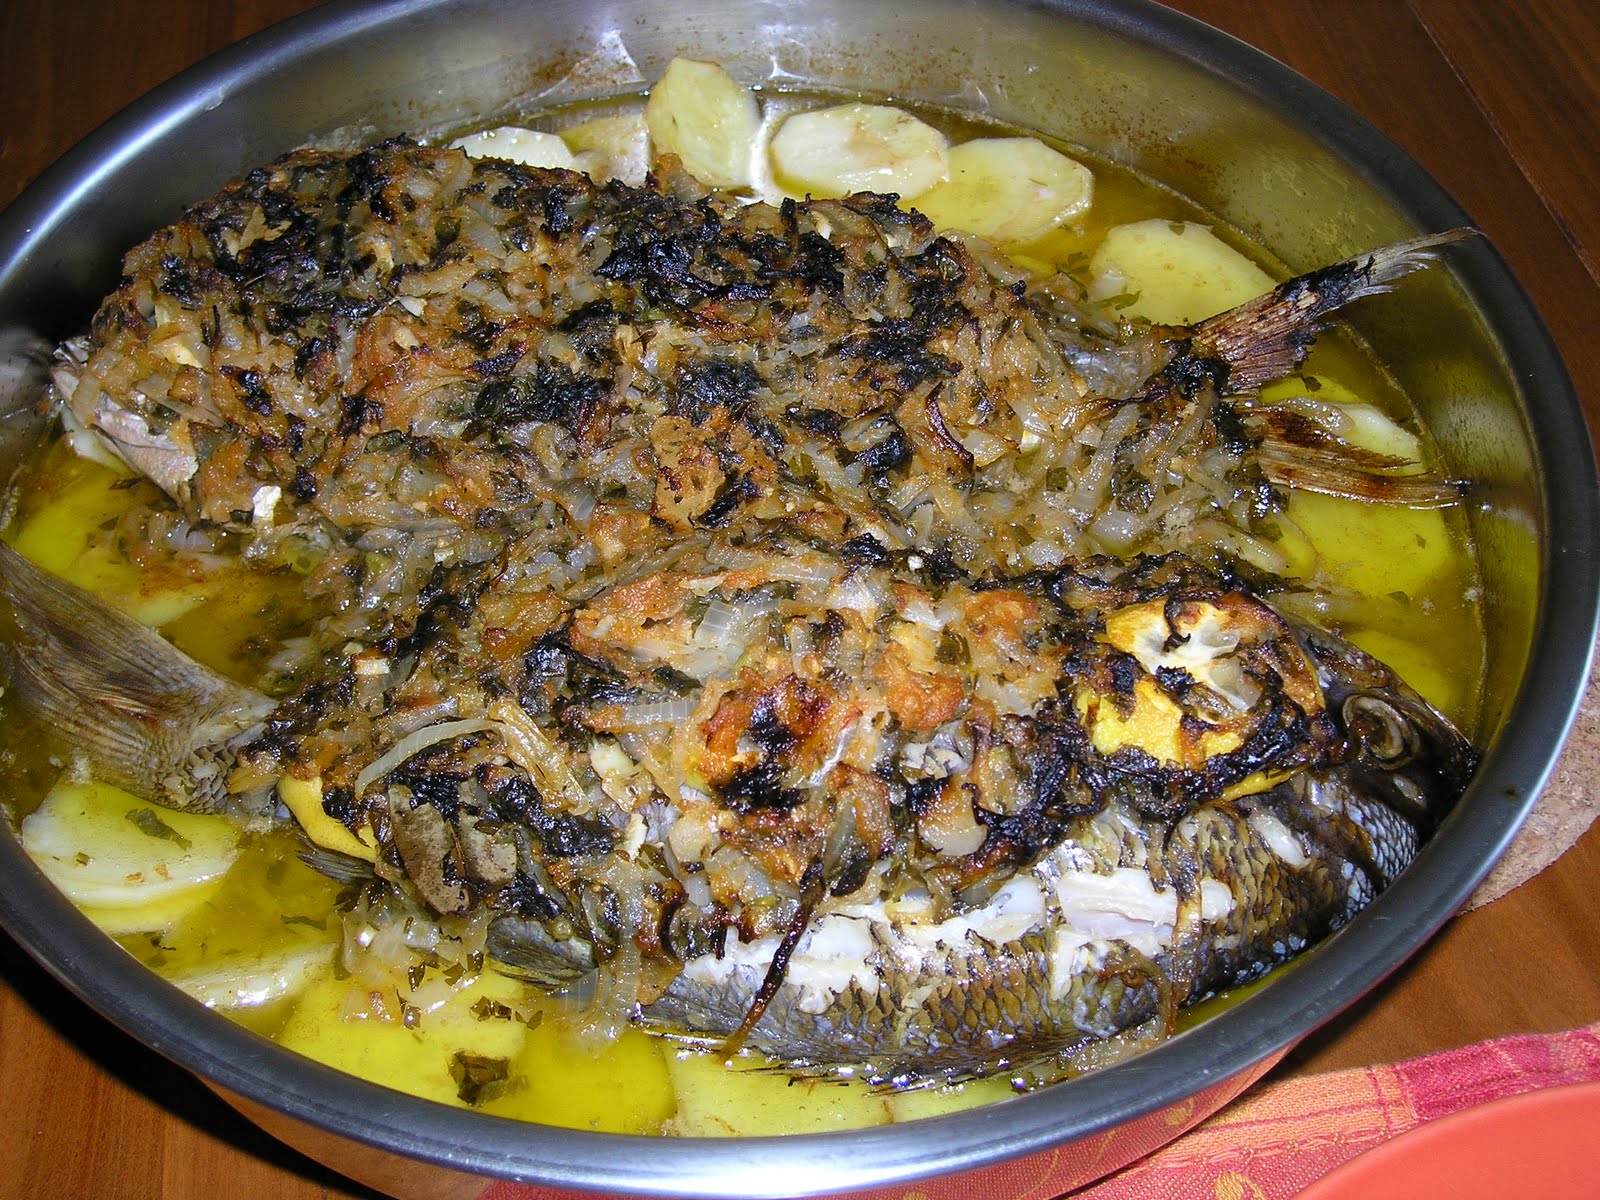
Cooked Fish Plaki

Serve immediately.
Καλη ορεξη!!!


Makes 4-6 servings

 Till next time stay well!

Saturday, April 9, 2011

How about some pita pockets?


I know that I have been away from my blog a little bit longer this time. A lot has been going on but it's all good. I am preparing for a trip back home to see my family while I am taking care of things on my U.S. home front. I am looking forward to going going back home and as always I dread the good byes. Over the years, I have come to accept that I am terrible with saying goodbye to loved ones and I wish I never had to do it. The truth though is that in life everything has an expiration date ... and we need to savor the moment, get the most out of life experiences before they come to an end!

These past few weeks, I have also started preparing my vegetable garden. Added lots of new soil and got rid of all the weeds. I will keep you updated... My goal is to enjoy some nice tomatoes, eggplants and zucchini this year.

I have also been continuing with my cooking classes something that's very fulfilling to me. I just had a great class two days ago. It was a full class with 18 people attending my hands-on class on Mediterranean vegetarian dishes. It was a lot of fun meeting new friends and also seeing some of my old cooking pals. We cooked, we joked a lot, we listened to Greek music and in the end we all enjoyed a nice meal together. What else can I ask for!

So my creative baking juices have been flowing these last few days and they have resulted into some action :-). The result is some pita bread! Easy and fun to make. I love pita pockets - they are so versatile! I use them to make sandwiches, serve them with dips, bake them and make simple pita chips for snacks and just eat them as part of any meal throughout the day.

Growing-up we used to eat pita bread along with our kebabs. We would always eat pita pockets that were filled with kebabs, chopped parsley, tomatoes, cucumbers and onions - yum! We would also make a variety of sandwiches with pita pockets which as you might already know can be different sizes and shapes.

Remember that you can always use white whole wheat flour which is a lot healthier than just white flour. I have started experimenting more and more substituting that in all of my recipes.


Pita Bread

2 teaspoons dry yeast
1 cup and 2 ½ ounces lukewarm water
1 1/3 tablespoon olive oil
3 ½ cups white whole wheat unbleached flour
1 teaspoon salt

In a large bowl combine the dry yeast, olive oil and lukewarm water.
Stir well and add ¼ cup flour in that. Cover with a towel and set aside for
5 – 10 minutes.
Pre-heat the oven to 450 degrees. Place in the hot oven the baking sheets you will be using.
Add the salt, and the remaining flour.
On a floured surface, start kneading the dough with your hands for about five minutes or until the dough is shiny, has a lot of elasticity and doesn’t stick to the hands.
Place back into the bowl. Spray some olive oil all over it and cover with a moist towel. Place in a warm area and let it rise for an hour and a half.
Divide into 12 round balls.

Place them on a baking sheet and let them rise for another 10 minutes.
On a floured surface, roll out each one of them into a 5-7 centimeters circle with approximately ½ centimeter thickness. 

Set them aside for another 10 minutes before baking.
Place on the hot non-greased baking sheets and into the oven.
Bake for about 1 ½ minutes on each side.
The dough will puff up creating the desired pocket.
Flip once. Let them cool off on a wire rack.

 Serve warm or at room temperature.

Tip of the day - storing pita bread in the freezer.
You can store them for a few months. After your pita pockets have cooled off completely, you can stack them in a zip log bag separating them with some parchment paper. Close the bag and store in your freezer. Take out as many as you need each time and then place back into the freezer.
Enjoy!

I hope to communicate with you once more before I take off for Europe but if I don't make it I will make sure that I post my baking Easter creations from Cyprus.

Sunday, March 27, 2011

Enjoying the Journey


A few days ago, I was talking with a good friend of mine about my culinary journey and its adventures and about all the things I want to do but I don’t have enough time …to do them! She simply answered to me – Do as much as you can and the most important thing is to enjoy the journey! It’s so true and I am so glad she said that to me! I try to remind myself of that all the time and I try to read my favorite’s poet K. Kavafes’ masterpiece (in my opinion) Ithaka – a poet which is all about the life journey and that it’s upto us to make it rich …

So this past week I tried to put things in perspective and stop dwelling on the ideas I have but I have no time to implement and focus on things I can do ... so this past Thursday I took a demonstration class with one my favorite chefs in the Sacramento area – Michael Tuohy. I thoroughly enjoyed the class and needless to say I had a delicious dinner which consisted of carnaroli risotto with asparagus and baby artichokes, halibut with Spring vegetable ragout and strawberry crisp. Michael Tuohy is the executive chef at Grange restaurant in Sacramento. I love all the food on the menu at this restaurant. The reason why I am drawn to his cooking is because he loves to cook with fresh local ingredients. It doesn’t take a lot to win me over to some style of cooking if it involves seasonal, fresh and local vegetables! A great way of cooking that I hope more of us adapt and follow.
 
Here is one of my favorite salad recipes that I created using seasonal vegetables. Try it and let me know what you think. It’s also a powerhouse of vitamins and anti-oxidants based on the ingredients that it has so you can fully enjoy it.

 
Crunchy Asparagus Salad

1 bunch asparagus or 8 stalks
½ cup roasted chopped walnuts
½ cup roasted pine nuts
1/3 cup roasted sesame seeds
1 garlic clove finely chopped
1 large red beet
1 cup chopped celery
½ cup crumbled feta
½ cup virgin olive oil
¼ cup wine vinegar
2 teaspoons pomegranate syrup or
substitute with some fresh pomegranate juice


First prepare the dressing.
In a bowl mix the olive oil, finely chopped garlic, wine vinegar and pomegrante syrup. Wisk well and set aside.

Cook the beet in boiling water. Let it cool off and remove the skin.
Cut in small cubes.
Wash the celery stalks and cut in small cubes.
Cut the bottom part of the asparagus which are not tender.
Place in a steamer and cook for 5 minutes or until you can easily fork them.
Don’t overcook them because we want them to maintain their crunchiness.
Cut in small bite size pieces and place in a salad bowl. Add the beet and celery.
Add the pine nuts, chopped walnuts and roasted sesame seeds into the salad.

Drizzle over the dressing. Toss well. Sprinkle the feta on top and serve.

You can also use other types of beets other than the red ones and you can mix and match! Remember that bright colors are appetizing!

Makes 4-6 servings

I love this salad because it’s easy to make and it’s tasty. The crunchy part of it is great for me since I love crunchy food!

Καλη ορεξη!

Till next time stay well!